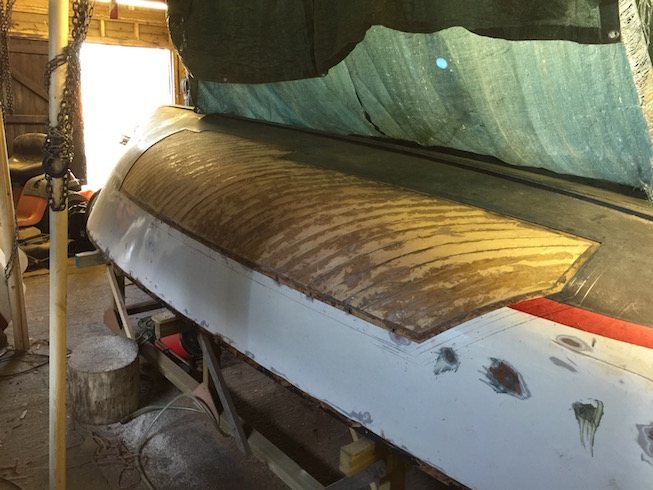
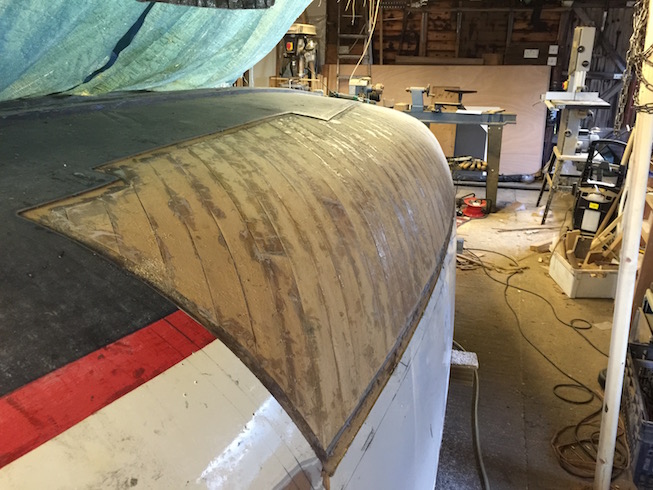
2015.12.29 - One Layer to go
After a short break over Christmas I started work on the second of three layers and the result is shown below.
Putting on a layer without having to cut away the hull first is very quick in comparison. In the morning you cut the veneers and staple them in place temporarily using long legged, metal staples with a wooden protector as you can see in the photos of the inner repair before I found out about plastic staples. As each veneer is cut it is stapled in place so that cutting the next veneer is fairly simple to do. About 2 hours is all it took me to cut the entire set of 41 veneers including the fiddly bits. I had a break after that, leaving the veneers in place to bend a little. After lunch I removed the metal staples and stacked the veneers in order having pencilled a number at the top of each veneer so I don’t get them mixed up.
Then begin the great mix up! I use 7oz plastic coffee cups in which to mix the epoxy and these can hold 3 pumps of resin and hardener plus the microfibres. Any more and the cup is too full. I need two cups of mixed and thickened epoxy to glue three of the longest veneers.
This time, unlike the first layer where I put the epoxy on to the strakes I put the epoxy directly on the hull and spread it out a bit. The reason for this is that epoxy, when it is curing, is exothermic and if you mix up too much at a time it can get so hot as to melt the plastic cup. I’ve managed to do that once or twice in my boating career! Because of this, whilst in the pot the epoxy only has a useful life of about 9 minutes at my workshop temperature. Spread it out over the hull a bit and that time goes up to 15 or 20 minutes. This allows me to mix up two or three cups of epoxy without having to worry about leaving it too long before placing the strakes, then having to rush to get the strakes in place before the epoxy is too hard and then making mistakes because I‘m rushing.
So having mixed up the two cups of epoxy and spread it around a bit on the hull I used a notched grout spreader to spread the glue where I wanted it to be. The veneers were stapled in place using the plastic staples this time and any gaps between the strakes filled in with the stuff that squeezed out, and boy did it squeeze out in places!
Repeat this 12 (ish) times and voila, one glued up layer. Leave to cure overnight, then use a small surform to trim off the high spots and excess epoxy.
So, only one layer left to glue in place, today’s job. I’ve already cleaned up the last layer and used the surform so after I’ve had a coffee break and posted this I shall be back to the workshop to start cutting the veneers for the last layer. As this is the outer layer I’ll be a little more careful in the cutting, but not a lot since I still have to use a long board, also known as a torture board, to fair the hull and that will remove many of the imperfections. I’m not a perfectionist in this regard.
The tarpaulin is back in place. It’s been raining and there are a few holes in the workshop roof and I have to protect the wood from the drips. You can’t use epoxy on wet wood. Well, not the epoxy I’m using.